The Handstand (HS) offers each Flyer 2 challenges, namely the art of balance and the way to get in the handstand. While the balance is essential for the solo artist, for the partner acrobatics the way is often the bigger hurdle. For the balance through the base it is sufficient if the flyer can hold its shape as soon as it reaches the position. The solo artist has to balance by himself.
Challenge number 1: The Art of Balance
In contrast to the standing tricks, necessary corrections of the base during balancing the handstand are reaching very delayed or not at all the flyers center of gravity. If a base does not master a trick with a standing flyer, this is a clear indication that it will not work in the handstand until right. If a base does not master a trick with the standing flyer, this is a unerringly indication that it will not work in the handstand too.
In the HS, the flyer has to learn to initiate necessary corrections always from the middle of the body. However, to this a lot of experience with the opening and closing of the belly space is necessary! Beginners usually correct with the joints until they hurt too much. Here it is important to find a good compromise between effort and success:
the arms must remain stretched (straw principle) and
the shear forces increases, the farther away correcting from the contact point happens (lever principle)…
Remains the correction in the shoulder as the smallest evil. All other joints of the flyer should freeze while he get balanced by the base.
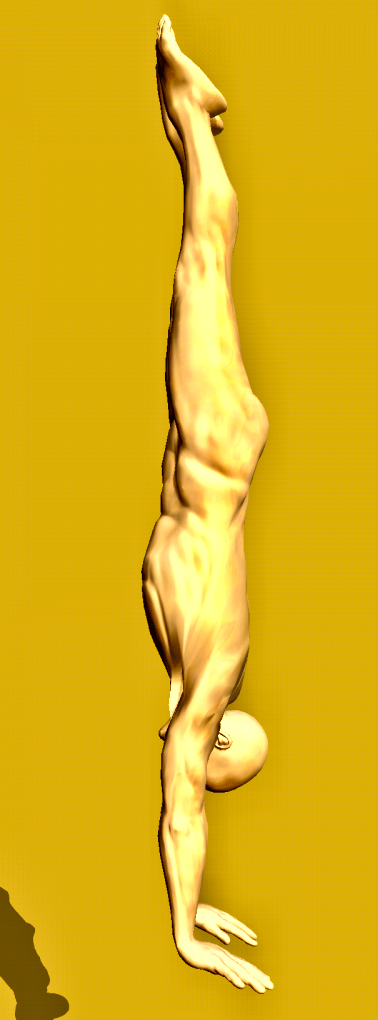
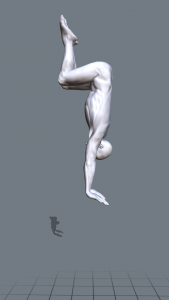
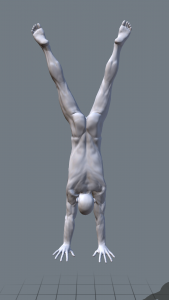
Another very interesting discussion is the position of the head in the HS … here is a video of Yuval Ayalon:
His excellent handstand line shows that the position of the head has no direct influence on the back line, but probably on the power line, what in turn can be recognized at the position of the shoulder over the hand. Hand, shoulder and center of gravity are always exactly vertical on top of each other. As soon as the head breaks out of this line, it must compensate for this by shifting the weight within the palm. Since the soil is not as weak as the base (straw problem), it remains of course unimpressed. Changing the center of gravity by one hand width may already require a correction step by the base.
By the way: Yuval’s legs on the way up is not ideal for the hand2handstand. The feet coming behind the back line, creating an undesirable shearing force. The way back from handstand to standing is perfect again. And so we are already in the middle of the challenge number 2 …
Challenge number 2: The way to get in the handstand
To understand the way to the HS, it is helpful to look at the axis of rotation and the center of gravity separately. While the axis of rotation is held as stable as possible in space, the center of gravity must be accelerated upwards in a circular path and rotated above the axis of rotation. There are only 2 options:
- tilt over forward (often misunderstood as rolling)
- tilt over to the side (known from the wheel turn at gymnastics)
In order to generate no shear forces, a high relieving with subsequent angular momentum is necessary. The angular momentum only needs to be sufficient for a quarter of a somersault or a quarter of a wheel sideways, which in turn should be easy for anyone who can jump from the edge of a pool into the water. So the difficulty within the beginning is not to generate enough angular momentum, but not to slow down too soon! So if you create a counter-impulse with your head or thighs, you initiate a backflip. Who jumps forward, shifts the axis of rotation and who angles the elbow slows down the rotation. The result is that the flyer does not get his center of gravity above the contact point.
Variant 1 – tilt over forward:
The term roles is therefore misleading because it implies that the body should roll like a carpet. In principle, there is nothing wrong with this picture, but very few people manage to control each individual vortex one after the other and individually. In fact, this is not necessary to get into the handstand. It is more important to prepare the body for the roll forward, to provide the high relieving and then the rotation …
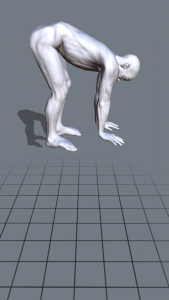
The rotation axis is the shoulder. Before the high relieving, this must always remain above the hands!
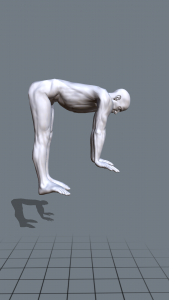
Phase 1: Flyer starts with a leaning position in tilt direction. The abdomen is tight and the connected hands are on pressure. The shoulder (and thus the axis of rotation) starts and ends above the contact point. The flyer starts with an active jump (i.e. jump without impulse!).
Phase 2: Transition from leaning to tilt over (= movement is similar to taking off pantyhose). The base must allow the tilting and produce the high relieving together with the flyer.
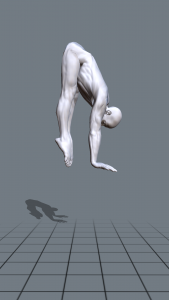
Phase 3:
Increase the rotation (“bring your butt over it”) by intensify the impulses within the direction of rotation → accelerate the heels and shoulder actively in the direction of rotation around the center of gravity. This will briefly produce a slight forward lean of the shoulder, which during the high relieving, however, does not shear the hands.
The volatile! package-position arises because the flyer pulls the upper body in the direction of the thighs, not the other way around! Again: the tightening of the thighs leads to a backwardsflip. The bending of the arms slows down the rotation and usually shears the arms outwards.
Phase 4: reach the desired shape, neither by changing the center of gravity, or by generating another rotation pulse. During this phase, the flyer will be picked up by the base, which let the flyer continue stretching until the end position is reached. So the flyer has no effort while stretching the legs into the HS.
Common Mistakes: within the 4th phase many flyers tend to generate rotation by a second impulse from the extension of the legs. However, this leads to an unnecessary shearing in the hands of the base, who then has to catch the flyer again.
Variant 2 – tilt over to the side:
The axis of rotation is the shoulder above the contact point.
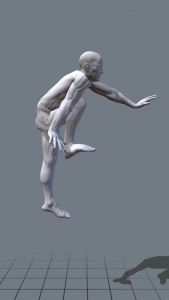
The flyers center of gravity is above his foothold. This will be different depending on the entrance of the trick. The picture shows the entrance by using the forearm of the base close to the elbow.
Phase 1: Flyer starts with an active jump (like a wheel turn at gymnastics) out of a volatile stand-libra.

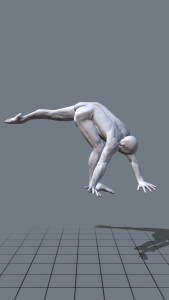
Phase 2: The base uses the thrust of the swinging leg (not the supporting leg!) To the high relieving. The flyer initiates a quarter screw turn analogous to the wheel turn.

Phase 3: The necessary rotation to the handstand is created by the swinging leg of the flyer.
Phase 4: The base picks up the flyer out of the volatile one-armed handstand. This will close the legs of the flyer and initiates the end position of the handstand.
Common Mistakes: Another impulse from the flyer leaves only unnecessary shearing forces. Some flyers try to move into the HS while pulling with the 2nd hand, which unnecessarily increases the strain on their shoulders. It’s also not a good idea to dive into the elbows.
Deutsch